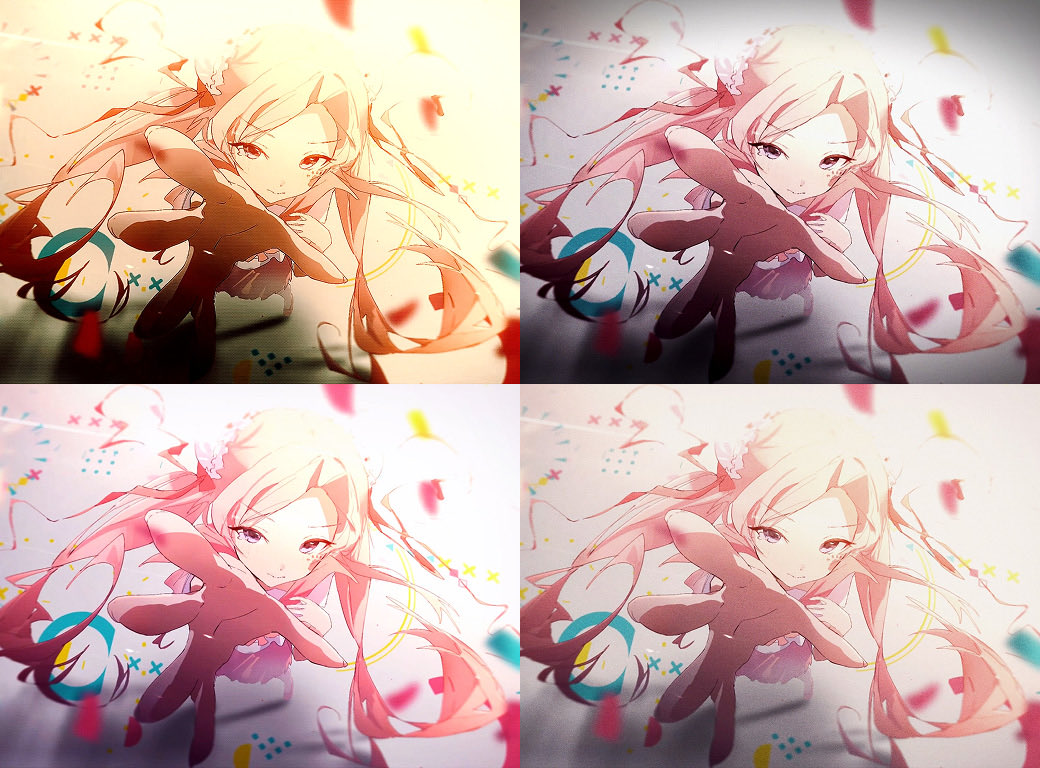
One plugin for film LUTs, grain, vignettes, and other color grading effects
A plugin that brings film LUTs, grain, vignettes, and other color grading effects together in one place. You can use controls such as color wheels, curves, and a look browser right inside Effect Controls.
Turn each of the 19 modules on and off with its Enable checkbox: Primary, Channel Mixer, HSL Secondary, Teal & Orange, Film LUT, Grain, Halation, Lens Distortion, and more. Each module has its own Reset button, and Solo Module in Preview lets you check a single module on its own.
02
Preview 104 looks on your own layer
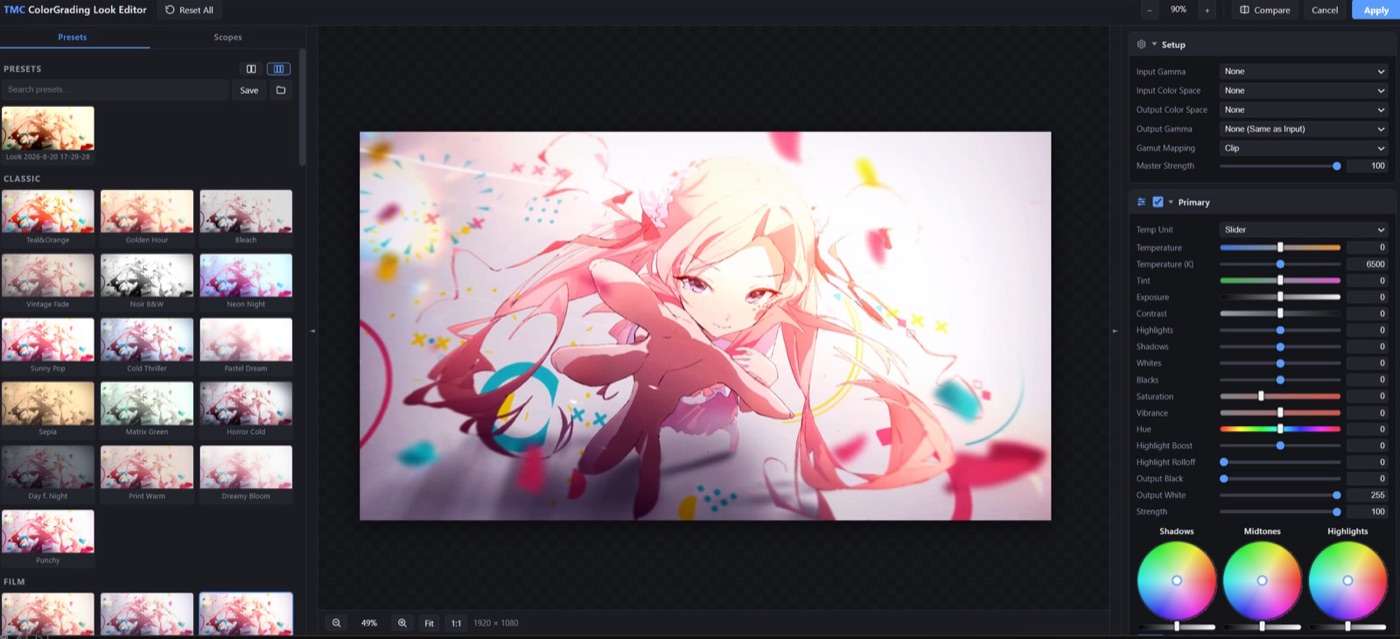
Compare and choose from 104 looks in 10 categories (Classic, Film, Anime, Cine, Portrait, Nature, Street & Neon, Retro Decades, Mood & Genre, Mono & Duo), shown as thumbnails of your actual layer frame. Looks are stored as module values with no external files, so you can adjust them freely once they're applied.
03
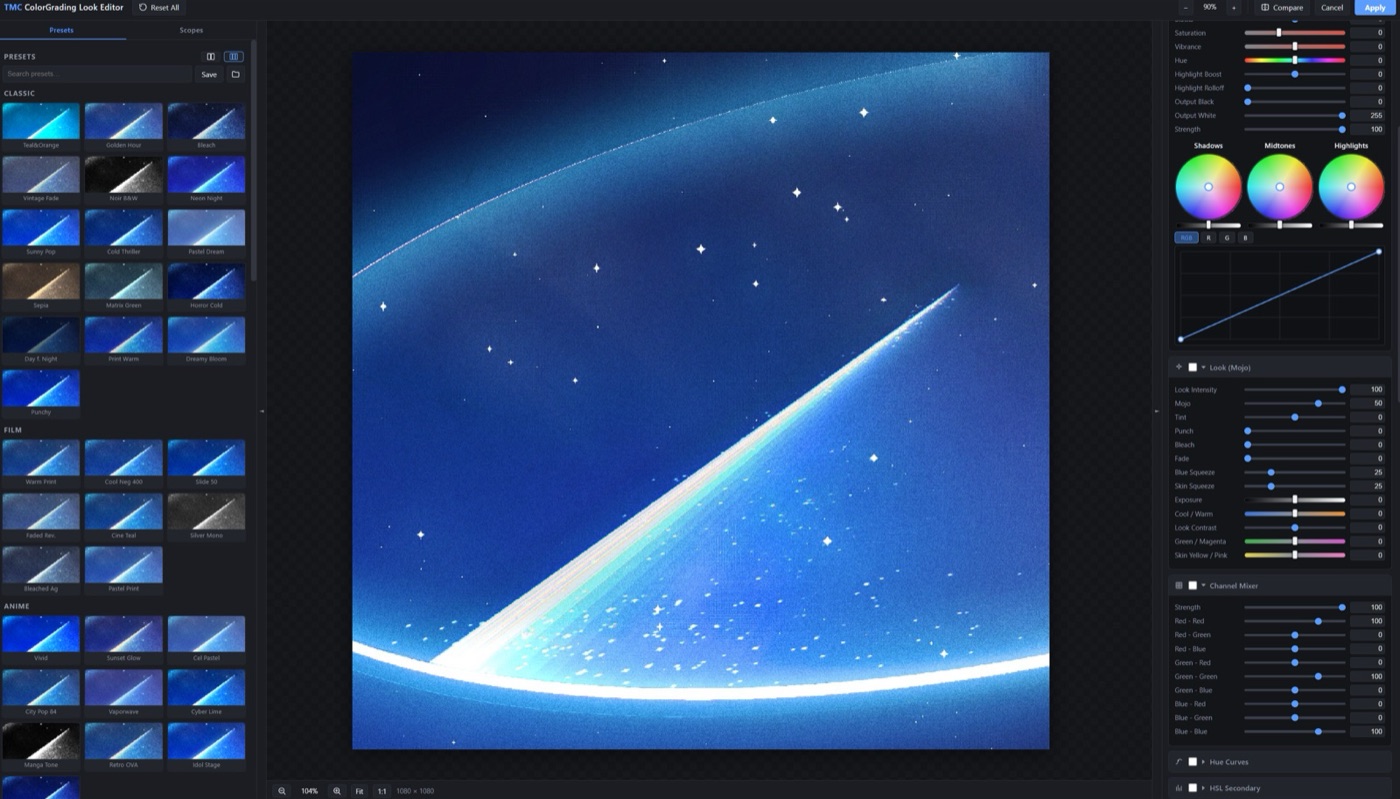
Look Editor and 7 scopes
Edit in a separate window where you can see the look list, controls, and a split comparison view at a glance, then click Apply to commit your changes to the effect. The 7 scopes, including RGB Parade, Luma Waveform, and Histogram, measure pre-clamp floating-point values, so highlights above 1.0 show up too.
04
Camera log and color space conversion
Decode ARRI LogC3/LogC4, Sony S-Log3, Panasonic V-Log, RED Log3G10, and BMD Film Gen5 log footage, convert between 13 color gamuts such as Rec.709, DCI-P3, Rec.2020, and ACEScg, and grade in that space.
05
4-LUT stack and automatic Lumetri LUT list
Stack up to 4 .cube files in order and adjust Look Intensity, exposure, saturation, and split toning separately for each one. Lumetri LUTs from your After Effects installation and LUTs in the Documents/TMC ColorGrading LUTs folder appear in the Look list automatically.
Quick start
Follow these steps in order the first time.
Select the layer or adjustment layer you want to grade and apply Effect › TMC › TMC ColorGrading.
Choose a look in Look Preset, or click the Browse Looks... button to open the thumbnail window and choose from there. Choosing a look resets all grading modules and then fills them with that look's values.
If your source was shot in log, choose the camera log in Input Gamma, and set Output Gamma and Output Color Space to match your delivery space.
In Primary, click a white or gray area with the WB Sample (pick neutral) eyedropper to set the white balance, then refine the tone with Exposure, Contrast, and 3-Way.
Turn on the Enable checkbox of modules like Grain, Vignette, and Halation to add texture, and compare with the original using Split Preview in Preview.
Before rendering, turn off Split Preview and set Solo Module back to None. Both settings also apply to the final render.
Parameter guide
Listed in the same order as the Effect Controls panel.
Effect Controls · TMC ColorGradingClick a group to expand it
Basic parameters10
Look Preset
Choosing a factory look resets every grading module to its defaults and then writes in that look's values; None (Custom) leaves the current grade untouched.
104 presets
Look Browser
The Browse Looks... button opens a look browser window with thumbnails rendered from the current frame.
Edit Look
The Edit Look... button opens the Look Editor window with a look list, controls, scopes, and a split comparison; changes reach the effect only when you click Apply.
Input Gamma
Sets the gamma or log curve of the source; with None, color space conversion is turned off entirely and the items below are disabled.
Sets the output curve the grading is done in; None (Same as Input) uses the input curve as is.
None (Same as Input)ARRI LogC3 (EI800)ARRI LogC4Sony S-Log3Panasonic V-LogRED Log3G10BMD Film Gen5sRGBRec.709 (2.4)Gamma 2.2Gamma 2.6 (DCI)LinearACEScctPQ (ST.2084)HLGFilmic (Reinhard + 2.4)
Gamut Mapping
When converting to a narrower gamut, out-of-range colors are clipped (Clip), gently compressed into range (Soft Compress), or kept as negative values (Keep (allow negatives)).
ClipSoft CompressKeep (allow negatives)
Reset
Resets the color management settings, from Input Gamma to Gamut Mapping, to their defaults.
Look Browser
Twirl it open to see look thumbnails in four tabs (Classic, Film, Anime, Cine) inside Effect Controls. Click a thumbnail to apply that look.
HSL Key (Secondary)12
Builds a key from hue, saturation, and brightness ranges so that all grading modules apply only to that area.
Enable HSL Key
Reset
A button that resets this group's values to their defaults
Show Matte
Shows the keyed area as a black-and-white matte so you can check the selection.
Hue Center
The hue angle at the center of the key
Hue Range (+/-)
Sets how many degrees (±) from the center hue to select; at 180, every hue is selected.
Hue Softness
Sets how softly the hue boundary falls off.
Saturation Min
The minimum saturation to select
Saturation Max
The maximum saturation to select
Luma Min
The minimum brightness to select
Luma Max
The maximum brightness to select
Range Softness
Sets how softly the saturation and brightness boundaries fall off.
Invert
Inverts the key so the grade applies outside the selection.
Primary23
The basic grading module, with white balance, exposure and contrast, tone, saturation, 3-Way color wheels, and curves. It is the only module that is on by default.
Enable Primary
Reset
A button that resets this group's values to their defaults
Temperature
Shifts the image warmer or cooler, with Tint adjusting green↔magenta alongside it.
Tint
Balances the color between green (-) and magenta (+).
Temp Unit
Chooses whether to set color temperature with a -100 to 100 slider or a 2000 to 11000K Kelvin value (Temperature (K)).
SliderKelvin
Temperature (K)
WB Sample (pick neutral)
Click an area that should be white or gray with the eyedropper, and the Temperature and Tint that make that color neutral are calculated automatically.
Exposure
Adjusts exposure in stops (-5 to +5).
Contrast
Raises or lowers contrast.
Highlights
A Lumetri-style tone slider that raises or lowers only the bright areas; Shadows, Whites, and Blacks adjust their own ranges the same way.
Shadows
Whites
Blacks
Saturation
Adjusts saturation from -100 to 200.
Vibrance
Boosts less saturated colors first, keeping skin and already vivid colors from going too far.
Hue
Highlight Boost
Highlight Rolloff
3-Way
Adds color by tonal range with Shadows, Midtones, and Highlights color wheels (lift, gamma, gain) and a brightness slider for each wheel.
Curves
Adjusts tone and per-channel color with Bezier curves in four tabs: RGB, Red, Green, and Blue.
Output Black
Output White
Strength
Module strength that blends the Primary result with the original
Channel Mixer12
A 3×3 channel mixer that mixes the R, G, and B inputs into each output channel at ratios from -200 to 200%, for color changes such as channel swaps or black-and-white conversion
Enable Channel Mixer
Reset
A button that resets this group's values to their defaults
Strength
Module strength that blends the Channel Mixer result with the original
Red - Red
How much of the Red input goes into the Red output; 100% by default.
Red - Green
How much of the Green input is mixed into the Red output; each output channel has three sliders like this, nine in total.
Red - Blue
How much of the Blue input is mixed into the Red output
Green - Red
Green - Green
How much of the Green input goes into the Green output; 100% by default.
Green - Blue
Blue - Red
Blue - Green
Blue - Blue
How much of the Blue input goes into the Blue output; 100% by default.
HSL Secondary4
Adjusts saturation and lightness per hue range, and strength per saturation range, by dragging in a single widget.
Enable HSL
Turns on the HSL Secondary module.
Reset
A button that resets this group's values to their defaults
HSL
Dragging the Hue vs Saturation wheel, the Hue vs Lightness wheel, or the Saturation EQ bars changes the saturation and lightness of specific hue ranges.
HSL Amount
The strength that blends the HSL adjustment with the original
Hue Curves4
Changes the hue and saturation of specific colors or brightness ranges with curves in three tabs: Hue (hue vs hue), H-Sat (hue vs saturation), and L-Sat (brightness vs saturation).
Enable Hue Curves
Turns on the Hue Curves module.
Reset
A button that resets this group's values to their defaults
Hue Curves
Adding points to a curve whose horizontal axis is hue (or brightness) and moving them up or down changes the hue and saturation of that range.
Strength
Module strength that blends the Hue Curves result with the original
Teal & Orange15
A cinematic look module that pushes warm colors toward orange and cool colors toward teal, automatically detecting and protecting skin tones
Enable Teal & Orange
Reset
A button that resets this group's values to their defaults
Look Intensity
The strength that blends the whole module (the look and all the sliders below) with the original
Separation
The strength of the teal/orange separation. This is the key slider, with the biggest effect on the result (50% by default).
Tint
Adds a green (-) or magenta (+) tint to the look.
Punch
Raises saturation and contrast together for a bolder image.
Bleach
Blends in a result with less saturation and more contrast, like bleach bypass.
Fade
Lifts the blacks for a faded look.
Cool Shift
Pushes blue areas that aren't skin further toward cyan.
Skin Warmth
Warms only the detected skin tones, so shots with few people change very little.
Exposure
Adjusts exposure in stops (-5 to +5).
Temperature
Tilts the whole look warmer or cooler, with Tint Balance adjusting green↔magenta as well.
Look Contrast
Adds or removes contrast from the look, pivoting around middle gray.
Tint Balance
Skin Hue
Shifts skin tones toward yellow (+) or pink (-).
Film LUT17
A film look module that stacks up to four .cube LUTs, each with its own Lumetri Creative-style adjustments. Entries are applied in order from the top.
Enable Film LUT
Reset
A button that resets this group's values to their defaults
LUT Stack
The list of LUT entries; the eye icon turns an entry on or off, dragging changes the order, and the selected entry's values appear in the sliders below.
LUT Entry
The Add button adds a new entry to the stack (up to 4).
Look
Automatically lists the LUTs in the Documents/TMC ColorGrading LUTs folder and the Lumetri LUTs (Creative and Technical) that come with your installed After Effects, so you can pick one.
Load Look
The Load .cube... button loads any .cube file (1D or 3D LUT).
Look Intensity
The strength that blends the selected LUT entry with the original
Temperature
Shifts the image warmer or cooler, with Tint adjusting green↔magenta alongside it.
Tint
Shifts the selected entry's color toward green or magenta.
Exposure
Exposure for the selected entry; Temperature, Tint, Contrast, and Vibrance are also stored separately for each entry.
Contrast
Raises or lowers contrast.
Saturation
Saturation for the selected entry
Vibrance
Boosts less saturated colors first, keeping skin and already vivid colors from going too far.
Faded Film
Lifts the blacks, warms slightly, and pulls back a little saturation for a faded film look.
Shadow Tint
The split-tone color applied to dark areas
Highlight Tint
The split-tone color applied to bright areas; Tint Balance moves the boundary between the two colors.
Tint Balance
Color Remap20
Has a Gradient mode that turns brightness (or a channel) into gradient colors, and a Selective mode that replaces chosen colors with other colors. The default mode is Selective.
Enable Remap
Reset
A button that resets this group's values to their defaults
Mode
Chooses between Gradient (gradient map) and Selective (color replacement).
GradientSelective
Source
In Gradient mode, the value that sets the position on the gradient (brightness or the R, G, or B channel)
LuminanceRedGreenBlue
Use Preset Palette
Fills the gradient in one step with one of 12 palettes such as Rainbow, Sunset, and Holographic.
12 palettes
Gradient
A gradient editor with up to 8 stops; the selected stop's color is changed in Selected Stop Color.
Selected Stop Color
Sets the color of the color stop selected in the gradient editor.
Cycle Repetitions
Sets how many times the gradient repeats across the brightness range (0.1 to 10).
Phase
Pushes the gradient along as if rotating it; keyframes or a time*360 expression make a loop where the colors cycle.
Color Maps
The mapping list for Selective mode, with up to 8 mappings; the selected mapping appears in the sliders below.
Selected Mapping
Mapping
The Add button adds one color mapping to Color Maps (up to 8).
Delete Selected
Enabled
Source Color
The original color to replace, picked with the eyedropper; Tolerance and Softness set how many similar colors are included.
Target Color
The new color that replaces Source Color
Tolerance
Softness
Sets the width of the soft falloff at the Tolerance edge.
Strength
Sets how strongly the selected mapping is applied.
Remap Amount
The strength that blends the Color Remap result with the original
Sharpen4
Unsharp mask sharpening and midtone local contrast (Clarity). A spatial module that reads surrounding pixels.
Enable Sharpen
Turns on the Sharpen module.
Reset
A button that resets this group's values to their defaults
Sharpen
Increases edge sharpness; the default is 100% when turned on.
Clarity
Adjusts midtone local contrast from -100 to 100.
Vignette13
Darkens or brightens the edges of the frame with any color and blend mode. The center, size, and rotation can be changed freely.
Enable Vignette
Reset
A button that resets this group's values to their defaults
Amount
Positive values push the edges toward Vignette Color (darker with the default black); negative values brighten them instead.
Size
The distance where the vignette starts, that is, the size of the bright area in the middle
Feather
The softness of the vignette edge
Roundness
Positive values stretch the ellipse horizontally and negative values stretch it vertically (0 by default).
Center X
The horizontal position (%) of the vignette center; Center Y sets the vertical position.
Center Y
Width
Horizontal size scale (10 to 300%)
Height
Vertical size scale (10 to 300%)
Rotation
Rotates the ellipse.
Vignette Color
The color applied to the edges
Blend Mode
How Vignette Color is blended
MultiplyScreenOverlayNormal
Grain12
Adds film grain noise, set separately for each brightness range. When Animation Speed is above 0, the grain changes over time.
Enable Grain
Reset
A button that resets this group's values to their defaults
Grain Amount
The overall strength of the grain
Grain Size
Grain size (1 to 8 pixels)
Color Grain
The amount of color noise mixed into the grain; 100% by default.
Shadow Grain
Grain response in dark areas; the default is 0%, so at first there is almost no grain in the shadows.
Midtone Grain
Grain response in the midtones (75% by default)
Highlight Grain
Grain response in bright areas (0% by default)
Texture
Sharpens the grain distribution for a rougher texture.
Monochrome
Shows the same grain structure in black and white only.
Animation Speed
How many times per second the grain changes (24 by default; 0 freezes the grain).
Random Seed
Changes the grain pattern.
Duotone7
A two-color toning module that applies different colors to the darker and brighter areas based on image brightness. It keeps the original brightness, so detail is preserved.
Enable Duotone
Reset
A button that resets this group's values to their defaults
Highlight / Shadow
Picks the highlight and shadow colors on two separate color wheels.
Highlight Tint
Sets how much of the highlight color to apply.
Shadow Tint
Sets how much of the shadow color to apply.
Balance
Moves the brightness at which the two colors switch.
Strength
Module strength that blends the Duotone result with the original
Shoulder6
A tone mapping module that gently compresses bright areas so highlights don't blow out to white
Enable Shoulder
Reset
A button that resets this group's values to their defaults
Curve
Chooses the tone mapping curve; Rolloff Start is used only with Reinhard.
ReinhardACES FilmicHable Filmic
Rolloff Start
The brightness where compression starts; darker values are left as they are.
Brightest Value
The value that ends up shown as the brightest (0 to 2); with ACES Filmic and Hable Filmic, this value is mapped to white (1.0).
Strength
Module strength that blends the Shoulder result with the original
Posterize5
Reduces the number of color levels to create stepped color areas like a poster or cel animation.
Enable Posterize
Reset
A button that resets this group's values to their defaults
Levels
The number of color levels per channel (2 to 64)
Dither
Mixes noise into the level boundaries to break up the steps smoothly.
Strength
Module strength that blends the Posterize result with the original
RGB Spectrum5
Pushes the color channels outward from the layer center by different amounts to create lens chromatic aberration. It gets stronger toward the edges.
Enable RGB Spectrum
Reset
A button that resets this group's values to their defaults
Red / Cyan
Radial shift of the Red channel (-300 to 300); the sign sets the direction.
Green / Magenta
Radial shift of the Green channel
Blue / Yellow
Radial shift of the Blue channel
Diffuse13
Creates a soft glow (optical diffusion or bloom) from bright areas. The glow can be tinted with two colors.
Enable Diffuse
Reset
A button that resets this group's values to their defaults
Threshold
The brightness where the glow starts; lower values make a wider area glow.
Threshold Softness
Softens the Threshold edge so the glow starts naturally.
Size
The radius of the glow
Intensity
How strongly the glow is composited onto the image
Brightness
The brightness of the glow itself (0 to 400%)
Falloff
The shape of the glow's tail (narrow to wide)
Gamma
Color 1
The first color applied to the glow
Color 2
The second color, mixed with Color 1 based on the glow's brightness
Color Strength
Sets how much Color 1 and 2 tint the glow (the default of 0% keeps the original colors).
Saturation
The saturation of the glow (150% by default)
Halation6
Creates a film-like reddish-orange fringe glow around strong highlights.
Enable Halation
Reset
A button that resets this group's values to their defaults
Amount
The strength of the halation (40% by default)
Threshold
The highlight brightness where halation appears (65% by default)
Size
The radius of the glow
Halation Color
The color of the glow; the default is the reddish orange of film halation.
Film Breath5
Makes exposure and black level fluctuate slightly over time, like film projection. The values change smoothly from frame to frame.
Enable Film Breath
Reset
A button that resets this group's values to their defaults
Amount
The size of the fluctuation; at 100%, exposure varies by about ±8%.
Speed
How many times per second the image fluctuates (0.1 to 12, 1.5 by default)
Random Seed
Changes the fluctuation pattern.
Lens Distortion5
Creates barrel or pincushion lens distortion around the layer center.
Enable Lens Distortion
Reset
A button that resets this group's values to their defaults
Distortion
The strength and direction of the distortion (-100 to 100); the sign switches between convex and concave distortion.
Flatten
Flattens the distortion toward the edges to change the shape of the curvature.
Scale
Scales the image from 50 to 400% to hide the edges exposed by the distortion.
Preview4
Tools for checking the grade. These settings also apply to the final render, so turn them off before delivery.
Solo Module
Renders only the selected module so you see that module's effect alone.
Splits the frame to show the original on one side and the graded result on the other.
Split Position
The position of the split line (%)
Split Direction
The direction of the split
VerticalHorizontal
Other parameters1
Strength
The master strength that blends the whole effect with the original, found at the bottom of the Effect Controls panel
Practical tips
Choosing a Look Preset resets all grading modules to their defaults and then writes in the look's values (Preview and color space settings such as Input Gamma are kept). Choose a look first, then refine the details. A single undo takes you back to your previous grade.
Split Preview and Solo Module are not preview-only. They also apply to the final render, so before adding the comp to the render queue, turn off Split Preview and set Solo Module back to None.
HSL Key masks only the color grading modules. Sharpen, Vignette, RGB Spectrum, Diffuse, Halation, and Lens Distortion apply to the whole frame regardless of the key.
By default, Grain applies only to the midtones (Midtone Grain at 75%). To add grain to darker areas too, raise Shadow Grain. To stop the grain from moving, set Animation Speed to 0.
Sharpen, RGB Spectrum, Diffuse, Halation, and Lens Distortion sample surrounding pixels, so they're heavier. Rendering takes the fastest GPU path when all five of these modules are off, so turn them on only when you need them.
The actual processing order is Primary → Channel Mixer → HSL Secondary → Hue Curves → Teal & Orange → Duotone → Color Remap → Film LUT → Shoulder → Posterize → Grain. This differs from the top-to-bottom order in the panel, so keep in mind that Duotone and Color Remap are applied before the LUT.
Where to use it
Apply it on an adjustment layer over an MV edit, unify the tone with a look like Cine: MV Punch, then add film texture with Grain and Halation.
Add an Anime-category look and Diffuse bloom to an animated or illustrated MV for a dreamy, glowing atmosphere.
Decode a live performance clip shot in log with Input Gamma, then apply a film look with the Film LUT stack so its color matches the motion graphics sections.
In Color Remap's Gradient mode, put a time*360 expression on Phase to make a psychedelic loop where the colors keep cycling.
All per-pixel modules (Primary through Grain, plus Vignette) run in a single GPU kernel, with support for After Effects' native GPU rendering (CUDA, OpenCL, Metal). Frames with Sharpen, RGB Spectrum, Diffuse, Halation, or Lens Distortion turned on are processed on the plugin's own GPU path (OpenCL on Windows, Metal on macOS) and automatically fall back to the CPU if that fails.
At 32bpc the stack's output is not clamped, so super-whites above 1.0 and out-of-gamut values pass to the next effect unchanged (at 8/16bpc it's clamped to 0–1). The scopes also show pre-clamp floating-point values, up to 1.5.
Imported .cube files (1D and 3D, with DOMAIN_MIN/MAX support) are resampled to a 33³ grid and saved inside the project, so they render the same even without the original LUT file. Film-category looks build a 33³ LUT from a film profile when applied and add it to the stack, so no external files are needed.
The time-varying flag is set only when Grain (with Animation Speed > 0) or Film Breath is on. Any other grade is static and makes full use of the After Effects frame cache, so RAM previews are faster from the second pass on.
Supports SmartFX (Smart Render) and Multi-Frame Rendering. Spatial modules request only as much extra input as they need, and the output never extends beyond the layer bounds.
Included in both Essential and Pro
Start with Essential for $99, or get all 25 with Pro for $199.