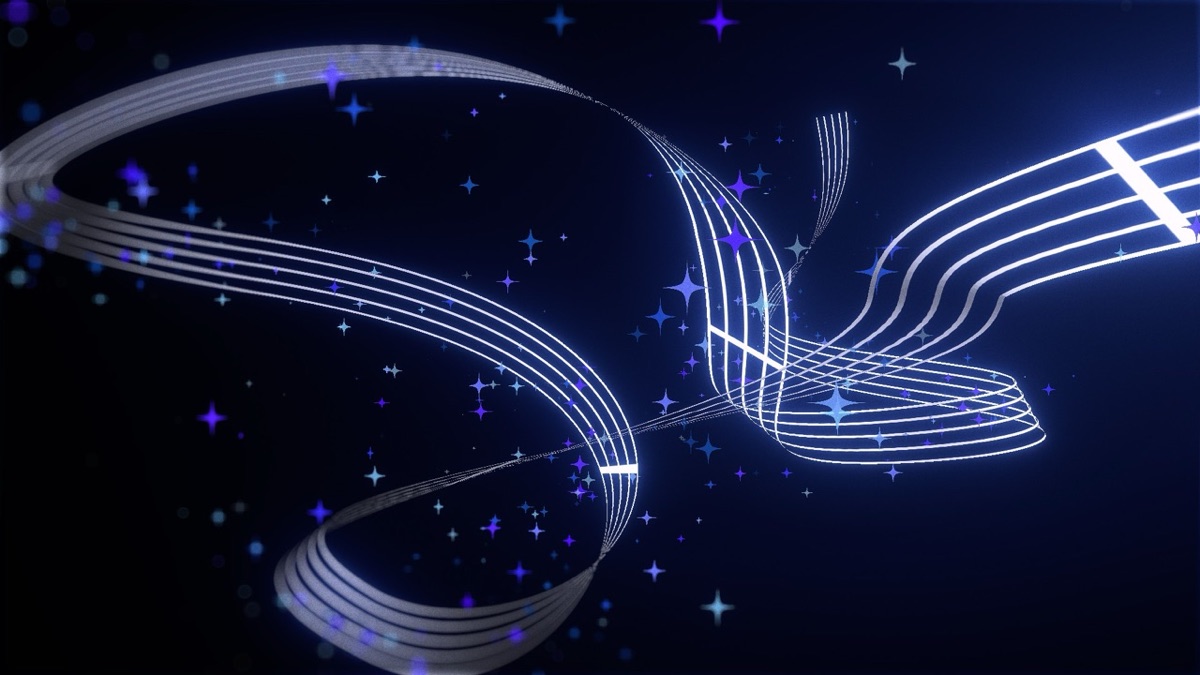
Draw paths freely in 3D space to create Ribbon, Tube, and Brush strokes, and add particles in the same 3D scene. One effect can hold up to 8 paths, and you can apply features such as gradients, textures, Trim Path, Repeater, Physics, and Particles.
Edit anchors, Bezier handles, and depth (Z) directly in the Composition panel with the Pen, Draw, Move, and Rotation tools. Bring in existing masks with Import from Mask, and use Create Path Controllers to link anchors to null layers so you can move them with keyframes and expressions.
02
Up to 8 paths in one effect, each with its own style
Create up to 8 paths (up to 32 anchors each). Each path you select in the Path list keeps its own width, color, trim, physics, repeater, and particle settings.
03
Three line types: Ribbon, Tube, Brush
Choose a ribbon you can give thickness to, a tube with a selectable number of sides, or a brush that stamps any layer you like as its tip. Refine the ends and shape of the line with 4 End Cap types, 3 Join types, Taper, and Roll/Curl.
04
Built-in particles in the same 3D space as the stroke
Emit particles along the stroke with Point, Box, or Path emitters, and build their motion with 8 texture slots, over life curves, Gravity, Wind, and Turbulent Noise. Turn on Follow Trim Path and particles come out along the line as it draws on.
05
Works directly with AE cameras and lights
Reads the comp camera (including multi-view), depth of field, and comp lights, and handles Foreground Layers (occlusion by 3D layers in front), Fog, and motion blur within a single effect.
Quick start
Follow these steps in order the first time.
Create a new comp-sized solid and apply Effect › TMC › TMC 3DStroke.
Draw a mask on the same layer and click Import from Mask in 3D Path Editor (if Use All Paths in Stroke is on, all masks are imported), or, with Edit 3D Path on, draw a path directly in the Composition panel with the Pen or Draw tool.
In Stroke, set Style (Ribbon, Tube, Brush) and Stroke Width, then choose Color, Gradient, or Texture Mapping under Type in Color & Texture.
Keyframe Trim End in Trim Path from 0% to 100% to animate the line drawing on.
Add a 3D camera and move it. With Use Composition Camera in Camera turned on (the default), the stroke responds to the camera move in 3D space. As needed, choose a Mode in Physics, turn on Enable Particles in Particles, and choose a Light Type in Lights.
Before the final render, check that Quality in Render Settings is set to Final, set Anti-aliasing to SSAA, and raise AA Samples to 2X or 4X.
Parameter guide
Listed in the same order as the Effect Controls panel.
Effect Controls · TMC 3DStrokeClick a group to expand it
Basic parameters1
Path list
A list of paths shown with color chips. Selecting a path loads its settings into the parameters below. You also rename and delete paths here.
3D Path Editor6
Creates and manages the 3D paths to draw. Pick a path in the Path list at the top, edit its anchors in the Composition panel, and link anchors to null layers (the Null Points subgroup has slots Point 01–32).
Edit 3D Path
When on, you edit the selected path directly in the Composition panel, and the effect renders from this path list (on by default).
Import from Mask
Imports the layer's masks as 3D paths. It takes the one mask chosen in Stroke's Path, or every mask if Use All Paths is on.
Create Path Controllers
Creates a null layer for each anchor and links it. Anchors that are already linked are left alone and only empty anchors are filled, so it's safe to press more than once.
Unlink Path Controllers
Writes the current null positions into the path, then breaks the link.
Re-link Path Controllers
Finds the null layers that match the naming rule and relinks them to the anchors.
Use Controllers
When on, the path anchors follow the position (and rotation) of the linked null layers.
Stroke9
Sets the line's input source, width, and cross-section shape. It contains the subgroups Segments, Brush, and Color & Texture.
Path
Chooses the mask to use when drawing from masks instead of the 3D path list. Import from Mask also takes its mask from this setting.
When on, uses or imports all of the layer's masks at once (on by default).
Stroke Width
Line width (px). The default is 5, and values up to 3000 can be entered.
Extrude
Adds thickness to the ribbon, turning a flat band into a squared-off bar.
Style
Chooses the line's form. Choosing Brush enables the Brush group.
RibbonTubeBrush
Tube Sides
Number of sides in the Tube cross-section (3–64). Lower values give an angular prism; higher values give a smooth cylinder.
End Cap Style
How both ends of the line are finished
FlatRoundRibbonSquare
Join Style
How corners are handled where the path bends (default Round)
MiterBevelRound
Miter Limit
Limits how far a sharp corner can extend in a Miter join.
Stroke › Segments3
X Segments
Curve resolution along the path. Raise it if curves look faceted (default 1024).
Y Segments
The number of subdivisions in Y. It doesn't affect the result in the current version; curve resolution is set with X Segments.
Z Segments
The number of subdivisions in Z. It doesn't affect the result in the current version; curve resolution is set with X Segments.
Stroke › Brush14
Brush Tip Layer
Sets the layer to stamp as the brush tip.
Stamp Orientation
Direction of the stamped brush marks. Billboard always faces the screen, and Align to Path lies flat along the path.
BillboardAlign to PathPath x Camera
Spacing Mode
Chooses what stamp spacing is based on: a percentage of brush size, pixels, or a percentage of path length.
Brush Size %PixelsPath %
Spacing
Stamp spacing in Brush Size % mode. Lower values pack the stamps tighter for a smoother line.
Spacing (px)
Spacing (Path %)
Spacing Jitter
Randomly varies the spacing for a hand-drawn feel.
Size Jitter
Randomly changes the size of each mark.
Scattering
How far (px) marks are scattered to the sides of the path
Opacity Jitter
Randomly changes the opacity of each mark.
Follow Path Tangent
With Billboard, rotates marks to follow the direction of the path.
Angle Jitter
Randomizes the rotation angle of each mark (0–180°).
Tip Orientation
HorizontalVertical
Seed
Changes the random pattern. The same value always gives the same result.
Stroke › Color & Texture14
Type
Chooses the fill method. Only the settings for the chosen method are enabled.
ColorGradientTexture Mapping
Color
Line color when Type is Color
Gradient Preset
12 gradient presets applied along the length of the line
12 presets
Output Cycle
An editor for setting the gradient stops (up to 8) directly
Selected Stop Color
Changes the color of the stop selected in Output Cycle.
Cycle Repetitions
Sets how many times the gradient repeats along the length of the line (0.1–10).
Texture Layer
The image layer wrapped around the line in Texture Mapping mode
Texture Orientation
Wraps the texture along the line (Horizontal) or across its width (Vertical).
HorizontalVertical
Texture Offset U
Texture Offset V
Texture Scale U
Texture Scale V
Texture Loop
Where the texture ends, continues it by repeating, mirroring, or clamping to the edge.
RepeatMirrorClamp
Texture Blend
Mix ratio between the texture and the line color
World Transform9
Moves, rotates, scales, and bends the entire drawn stroke in 3D space.
Enable Bend
When on, enables Bend and Bend Axis.
Bend
Bends the entire stroke into a curve around one axis.
Bend Axis
The axis to bend around (default Y)
XYZ
XY Position
On-screen position of the entire stroke
Z Position
Depth position of the entire stroke
X Rotation
Rotates the entire stroke around the X axis.
Y Rotation
Rotates the entire stroke around the Y axis.
Z Rotation
Rotates the entire stroke around the Z axis.
Scale
Size of the entire stroke (0–1000%)
Foreground Layers11
Compares depth and hides the stroke wherever the specified layers are in front of it. Use it for shots where a line wraps around behind an object.
Enable Occlusion
When on, occlusion is applied.
All 3D Layers
Uses every 3D layer in the comp as an occluding layer.
Layer 1
Slots for choosing occluding layers directly (Layer 1–5)
Layer 2
Layer 3
Layer 4
Layer 5
Feather [px]
Softens the edge of the occluded area.
Offset [px]
Expands (+) or shrinks (−) the occluded area.
Z Tolerance
If the depth difference between the stroke and a layer is at or below this value, no occlusion is applied, which reduces flicker at the edges.
Invert Mask
Inverts the occluded area.
Trim Path4
Trims the visible section of the line to animate it drawing on and off.
Trim Start
Position where the visible section starts (%)
Trim End
Position where the visible section ends (%). Keyframe it 0→100% and the line draws on.
Trim Offset
Slides the whole visible section along the path (−100 to 100%).
Reverse
Reverses the drawing direction.
Physics10
Adds wobble to the line. It moves on its own over time, so the line looks alive even without keyframes.
Mode
Chooses how the line wobbles: Wave, Wind, or Turbulent Noise. With None (the default), the line doesn't wobble.
NoneWaveWindTurbulent Noise
Magnitude
Wobble amount (px)
Frequency
Sets how many times the wobble repeats along the path.
Speed
How fast the wobble flows over time
Phase Offset
Shifts the starting phase of the wobble.
Enable Ramp
When on, the wobble fades out toward the end of the path so the end stays fixed.
Reverse Ramp
Reverses the ramp direction so the start point stays fixed instead.
Direction Rotation X
Rotates the wobble direction around the X axis.
Direction Rotation Y
Rotates the wobble direction around the Y axis.
Direction Rotation Z
Rotates the wobble direction around the Z axis.
Particles4
Emits particles in the same 3D space as the stroke. Fine-tune them with the subgroups Emitter, Particle, Physics, and Deform (Turbulent Noise).
Enable Particles
Turns particles on.
Follow Trim Path
When on, particles are emitted only from the section left visible by Trim Path (on by default).
Trim Anchor
Sets which end of the trim the Point and Box emitters follow (default End).
StartEndBoth Ends
Light Affects Particles
When on, particles are shaded by the lighting too.
Particles › Emitter21
Emit Per Sec
Particles emitted per second. The number visible at once is roughly Emit Per Sec × Life[Sec], and the Path emitter produces more the longer the path is (up to 20,000 per path).
Emitter Type
Chooses where particles are emitted from: a point, a box, or the whole path (default Path).
PointBoxPath
Follow Path Physics
When on, particles come from the line's position as it moves under Physics.
Offset
Moves the emitter position in 3D.
Size X
Size of the Box emitter (Size X/Y/Z). With the Path emitter, Size X/Y spread the particles around the path.
Size Y
Size Z
Rotation X
Rotation around the X axis
Rotation Y
Rotation around the Y axis
Rotation Z
Rotation around the Z axis
Direction
The rule that decides which direction particles are emitted in
The 3D point particles head toward in Towards Target mode
Velocity
Emission speed
Velocity Random
Randomizes the speed for each particle.
Velocity Add From Motion
Adds a share of the stroke's own movement speed to each particle's velocity at birth.
Direction Rotation X
Rotates the emission direction around the X axis when Direction is Directional or Bi-directional.
Direction Rotation Y
Rotates the emission direction around the Y axis when Direction is Directional or Bi-directional.
Direction Rotation Z
Rotates the emission direction around the Z axis when Direction is Directional or Bi-directional.
Random Seed
Changes the random pattern. The same value always gives the same result.
Global Random Seed
Particles › Particle23
Particle Type
Chooses between a circle, a 2D texture that faces the screen, and a texture that rotates in 3D.
Circle2D Texture3D Texture
Life[Sec]
Particle lifespan (seconds). Multiplied by Emit Per Sec, it determines how many particles are visible at once.
Life Random
Size
Particle size
Size Random
Gives each element a different, random size.
Size over life
A curve that sets how size changes over the particle's life
Rotation Z
Rotation around the Z axis
Rotation Z Random
Spin Speed
Spin Speed Random
Rotation X
Rotation around the X axis
Rotation X Random
Rotation Y
Rotation around the Y axis
Rotation Y Random
Opacity
Opacity Random
Opacity over life
A curve that sets how opacity changes over the particle's life
Color Type
Chooses between a solid color, random multiple colors, and the stroke's gradient colors.
SolidRandom MultiStroke Gradient
Colorize
How much of a texture particle's own color is replaced by Color and Color over life. At 0% (the default) the particle color multiplies the texture colors, and at 100% only the texture's shape remains. It isn't used for Circle particles.
Color
The particle color when Color Type is Solid. With Random Multi, each particle's color varies from this base color.
Color Random
Color over life
A gradient that sets how the color changes over each particle's life. It multiplies the particle color, so the default (white to white) leaves the color unchanged.
Color over Life Preset
Choosing one of the 12 presets loads it into the Color over life gradient. (none) leaves the current gradient as it is.
12 presets
Particles › Particle › Texture11
Count
Number of texture layers used in the Texture subgroup (1–8)
Usage
Sets whether to use a single texture or pick randomly from several for each particle.
SingleRandom Multi
1.Texture
2.Texture
3.Texture
4.Texture
5.Texture
6.Texture
7.Texture
8.Texture
Time Type
Sets which frame is used when the texture is a video.
Current TimeCurrent Time FreezeStart at Birth - Play OnceStart at Birth - LoopStart at Birth - StretchRandom - Still FrameRandom - Play OnceRandom - Loop
Particles › Physics6
Gravity
Force that pulls particles down (or up)
Mode
None turns off Gravity, Air Resistance, and Wind, and Air turns them on (the default is Air).
NoneAir
Air Resistance
Slows particles down over time.
Wind X
Wind in the X direction
Wind Y
Wind in the Y direction
Wind Z
Wind in the Z direction
Particles › Deform › Turbulent Noise11
Affect Size
How strongly the noise changes particle size
Affect Position
How strongly the noise shakes particle position
Fade-in Time[sec]
How long the noise takes to fade in on newborn particles
Scale
The size of the noise pattern. Higher values make the pattern larger and gentler (1000 by default).
Complexity
Number of stacked noise layers (1–6)
Octave Multiplier
Octave Scale
Evolution Speed
How fast the noise changes over time
Evolution Offset
X Offset
Y Offset
Camera2
Sets whether the comp camera is used and cleans up depth-of-field edges.
Use Composition Camera
When on, projects through the comp's active camera and follows its depth-of-field settings too (on by default).
DOF Edge Cleanup
Cleans up the edge bleeding (halos) that depth-of-field blur creates.
Repeater2
Makes up to 32 copies of the stroke. The subgroups Offset & Transform, Randomize, Falloff, and Per-Copy Shape vary each copy.
Enable
Turns the repeater on.
Repeat
Number of copies (1–32)
Repeater › Offset & Transform7
X Displace
X offset accumulated with each copy (Y Displace and Z Displace work the same way)
Y Displace
Y offset accumulated with each copy
Z Displace
Z offset accumulated with each copy
Repeat Scale
Rotation Step X
Rotation Step Y
Rotation Step Z
Z rotation accumulated with each copy (X and Y are available too)
Repeater › Randomize5
Position Jitter
Randomly scatters the copy positions.
Rotation Jitter
The amount of random variation in each element's rotation
Scale Jitter
The amount of random variation in each element's size
Width Jitter
The amount of random variation in each element's thickness
Random Seed
Changes the random pattern. The same value always gives the same result.
Repeater › Falloff2
Opacity Falloff
Lowers opacity progressively for later copies.
Width Falloff
Repeater › Per-Copy Shape6
Lateral Offset
Spreads copies sideways from the line so they run side by side. Use it to make multi-strand parallel lines.
Depth Offset
Trim Stagger
Offsets the trim in time for each copy so the copies draw on one after another.
Wave Phase / Copy
Offsets the Physics wobble phase for each copy.
Magnitude / Copy
Shape Variation
Varies the wobble shape for each copy so they don't look like identical duplicates.
Taper6
Thins the start and end of the line, and uses a curve to set how width changes along its length.
Enable
Turns taper on.
Start Thickness
Thickness ratio at the start
End Thickness
Thickness ratio at the end
Taper Start
Length of the section that tapers at the start
Taper End
Length of the section that tapers at the end
Width over Length
A curve that sets how width changes along the full length of the path
Roll8
Twists or tilts the line, and curls one end into a spiral.
Roll Angle
Twists the line around its direction of travel.
Roll Tilt
Tilts the line sideways.
Roll Radius (legacy)
Curl Amount
How much the end curls (0–1)
Curl Direction
Chooses which end curls, the start or the end (default: end).
Start End CurlsEnd End Curls
Curl Turns
Number of turns in the curl
Curl Falloff (legacy)
LinearQuadraticCubic
Radius Extend per Turn
How much the spiral radius grows with each turn
Lights12
Sets the lighting method and material. Comp lights can be read directly to give the line a sense of volume.
Light Type
None gives flat color with no lighting, Environment uses a built-in parallel light, and Use Comp Lights uses the comp's lights (default Environment).
NoneEnvironmentUse Comp Lights
Light Intensity
Lighting intensity
Ambient
Base brightness of surfaces the light doesn't reach
Light Direction X
Direction of the Environment parallel light (Light Direction X/Y/Z)
Light Direction Y
Light Direction Z
Material Preset
Material presets. Choosing one sets the material values below all at once.
7 presets
Roughness
Surface roughness, which sets how widely highlights spread
Metallic
How metallic the surface is
Fresnel
How much reflections strengthen toward the edges
Specular
Highlight strength
Light Falloff Distance
Reference distance over which Point and Spot lights fall off
Fog5
Makes the line fade into the fog color the farther it is from the camera, adding depth.
Enable Fog
Turns fog on.
Fog Color
Fog color
Near (Z start)
Depth where the fog begins
Far (Z full)
Depth where the fog is densest
Strength
Maximum fog strength
Render Settings9
Sets quality, output, anti-aliasing, and motion blur.
Quality
Draft lowers curve resolution to 1/4 and Preview to 1/2 so you can work faster (default Final).
DraftPreviewFinal
Output
Chooses whether to draw the stroke, the particles, or both, or to view a wireframe.
Matches motion blur to the comp settings or turns it on or off directly (default Off).
Comp SettingsOffOn
Shutter Angle
Shutter angle when Motion Blur is On
Shutter Phase
Shutter phase when Motion Blur is On
MB Samples
Number of motion blur subframes. Higher is smoother but slower (default 8).
124816
Release GPU Memory
Releases the GPU buffers this plugin was using.
Practical tips
When you select a path and change a value, it is saved to that path only. If you keyframe a parameter, though, that value applies to all paths. If each path needs its own animation, use null controllers or per-path values instead of keyframes.
The result is drawn only within the bounds of the layer the effect is applied to. Apply it to a comp-sized solid so the lines don't get cut off.
X Segments sets the curve resolution (Y Segments and Z Segments currently have no effect on the result). While you work, lower Quality to Draft or Preview to speed things up.
When Use Composition Camera is on, motion blur is built by accumulating camera movement and Physics motion across subframes. Set Motion Blur to Comp Settings to follow the comp's shutter angle and phase.
If you duplicated the layer, click Create Path Controllers once. It leaves the original layer's nulls as they are and creates and links new nulls only for the duplicate's empty anchors.
On Windows, rendering is accelerated with CUDA on NVIDIA GPUs (RTX 20 / GTX 16 series and later); on Mac, with Metal. Other Windows GPUs render on the CPU. To free up GPU memory, click Release GPU Memory.
Where to use it
3D ribbons of light that wrap around MV lyrics or a title and turn with the camera
A line-drawing opening that draws on the lines of a logo or illustration with Trim Path
Magic or comet trails with particle tails scattering along the path
Calligraphy strokes made by stamping brush marks with Brush Tip Layer
The GPU rasterizer, which splits the frame into tiles and gathers triangles into them, is implemented in CUDA on Windows (compute 7.5 or later, Turing generation onward) and Metal on macOS (shaders compiled at runtime). When no GPU is available, the same mesh is drawn by a CPU rasterizer.
The AE camera is read again for each view, so strokes draw correctly in Composition panel multi-view layouts such as Front/Top/Left/Custom. Depth-of-field blur is applied by reading the camera's Depth of Field, Focus Distance, Aperture, and Blur Level.
Use Comp Lights reads the comp's Parallel, Spot (including cone angle and feather), Point, Ambient, and Environment lights and shades with a material based on Roughness, Metallic, Fresnel, and Specular. Shadows are not calculated.
Particles use no simulation cache: each particle's age and position is calculated deterministically from time and seed, so Multi-Frame Rendering gives the same result no matter which frame the render starts from.
Supports 8/16/32bpc, SmartFX, and Multi-Frame Rendering (thread-safe). Paths and their per-path styles are saved as effect data, so they travel with the project.
This is a Pro-only plugin
A one-time purchase of Pro for $199 gets you all 25 plugins, plus any plugins added later.